Dance Floor. Lets Work!

My wife and I own/operate a few properties that we rent to the students of our Alma Mater, John Carroll University.  We’ve heard plenty of landlord horror stories, particularly those related to college students, but (*knock on wood*) all of our tenants have been tremendous thus far.

Anyways, we’re planning a kitchen remodel at one of the properties over their Christmas break.  I started a text message thread with the kids to make them aware so they could get their stuff out of the kitchen.  As expected, they were thankful the work was being done.  After all, they’re getting new cabinets and granite. Why wouldn’t they be happy?

Then came 1:12AM on a drinking night.  Apparently, they forgot their landlord was on the thread:

jcu texts

Century Home: Second Floor Layout

Old homes present interesting problems, especially with the intention of flipping. One of the most common characteristics of  homes built during the 1920-30’s is the lack of bedroom space.  In the early 20th century, families typically spent their time together on the first floor and rarely retired to their bedrooms for anything but sleep.  Living rooms and dining rooms were huge, but bedrooms and kitchens were tiny.

Today’s buyers, however, want space and lots of it.  Master suites with an attached bath are huge selling points, but rarely seen outside of new construction.

With that in mind a quite a bit of space to work with, we’ve decided to do a little bit of rearranging on the second floor.  The home has five bedrooms and two full bathrooms on the second floor, none of which are all that big. As you can see in the architectural drawing below (thanks, dad!), we’re turning the home into a four bedroom property.

The current plan is to create a large master bedroom that makes up the entire right side of the second floor.  The cost in doing so was pretty nominal (demo two closets & build two walls), but I think it adds tremendous value and appeal to the property.

2nd floor


New entryway to the master bedroom, looking from the hallway.  Closets used to separate the two rooms.

New entryway to the master bedroom, looking from the hallway. Closets used to separate the two rooms.

Century Home: Mud Room Inspiration

The Century Home we’re currently rehabbing has a wonderful mud room in the rear of the home, but it’s largely an empty space that is calling for a wonderful built in storage unit. In that we’re assuming a move-up buyer with 2-3 children will be buying this home when it’s complete, we thought it’d be appropriate to build a custom storage unit with both seating and ample storage for the kiddos.

Our inspiration is below.  Which one do you like the most?


Century Home: Interior Before Pictures

We’re officially on day 6 of construction at the Century House.  So far, our HVAC contractor has been removing the existing radiators and associated plumbing in preparation for a whole-house forced air system.  Our general trades will begin demo of the kitchen, bathrooms and a few walls on the second floor this week.  We’re beyond excited to be in the full throws of rehab.

I stopped by the house earlier this week to take a few “before” interior photos.  Below is a quick photo tour of what will, in 3-4 months, be a beautifully restored home in  a storied neighborhood.

Note: The home was vacant for two years and was broken into by some punk kids, who decided to add a little bit of their own vulgar graffiti. 

IMG_4613

Butler stairwell and butler’s pantry off the kitchen. Both will be demo’d to increase the size of the kitchen by 40%.

IMG_4614

Kitchen – cabinets and soffit to be demo’d this week. Increased square footage will allow for a center island.

Dining Room - love the coffered ceiling!

Dining Room – love the coffered ceiling!

Looking down from the stairwell to the front entry.  To the left, the living room.  To the right, the dining room.

Looking down from the stairwell to the front entry. To the left, the living room. To the right, the dining room.

Center hall colonial - stairwell leading to the second floor.

Center hall colonial – stairwell leading to the second floor.

HUGE living room.

HUGE living room.

The hardware in the home is tremendous!

The hardware in the home is tremendous!

Third floor.  Will make for an amazing rec room.

Third floor. Will make for an amazing rec room.

Second floor hallway.

Second floor hallway.

Current master bath.

Current master bath.

Reader Email: DIY or Hire a Contractor?

Hi Guys.  Love the blog! Thanks so much for sharing your experiences with us; it’s awesome to see.  Flipping a house is something my husband and I have wanted to do for a while, but aren’t really sure where to start. We both have full-time jobs, so I’m not sure if we even have the time.  Do you do the work yourselves, or do you have contractors? Thanks so much.  I can’t wait to see how your latest project turns out – it’s huge!

– Joan

Hi Joan,

Thanks for the email and the
kind words! Great question. We’ve done both.

For our first property (a rental) we basically did everything ourselves (paint, tile, flooring, bathrooms, finished basement, etc).  The rehab took a total of 63 days, with my father and I working most weeknights from 6-10 and then weekends from 8am – 8pm.  We subbed out plumbing and the garage rebuild.  Between my full time job and the rehab, I was working about 80 hours a week.  It wasn’t ideal, but we saved a lot of money. We also do most all of the work at our other rental properties.  If you’re not afraid of putting in the time, then by all means do the work yourselves!  It’s a great way to appreciate and understand everything that goes into a rehab.

That said, I’ll probably never do that again.  For our Century Home flip we’ve subbed out the entire scope of the project, from electrical and plumbing to paint.  There is certainly pieces of the project we could do ourselves to save some cash, but given the size of the house there is no way we’d be able to meet our project timeline.  Managing a crew is a full-time job in and of itself, so while I may not be laying tile I’m sure I’ll be glued to my phone.

Good luck!

The Century Home

Hi there! It’s been awhile.

It’s been a pretty hectic time on our end! My better half will probably be giving birth in the next week to a beautiful baby girl and over the last few weeks we’ve been focused on getting her nursery finished. We’ll share those pictures with you soon!

As if that weren’t enough work, we’ve spent the last few weeks interviewing contractors for our latest rehab. Typically it shouldn’t take this long to get a scope of work and bid in place, but alas this house is MASSIVE. Like, you can fit all of our other properties inside of it big.

All told, the house is about 4,000 square feet spread across three stories (not including the basement) and is in need of some love in pretty much every room.

Nestled near Coventry Village in historic Cleveland Heights, it’s a center hall colonial style home that has been occupied by the same family since it was built in 1914. The previous owners did some work here and there, but it’s very much been untouched since it was built. It looks pretty shabby today, but I imagine that it was wonderful place to call home 100 years ago.

We’re hopeful that we’ll have a contractor selected in the next week and have construction begin shortly thereafter. We’ll be sure to keep you in the loop.

Until there, here are some exterior shots:

Grandma’s House: Before & After

I promised before & after pictures of our latest rehab property and here they (finally) are. The rehab was completed a few weeks ago and our new tenants, three college students from my Alma Mater, moved in just a few days ago.

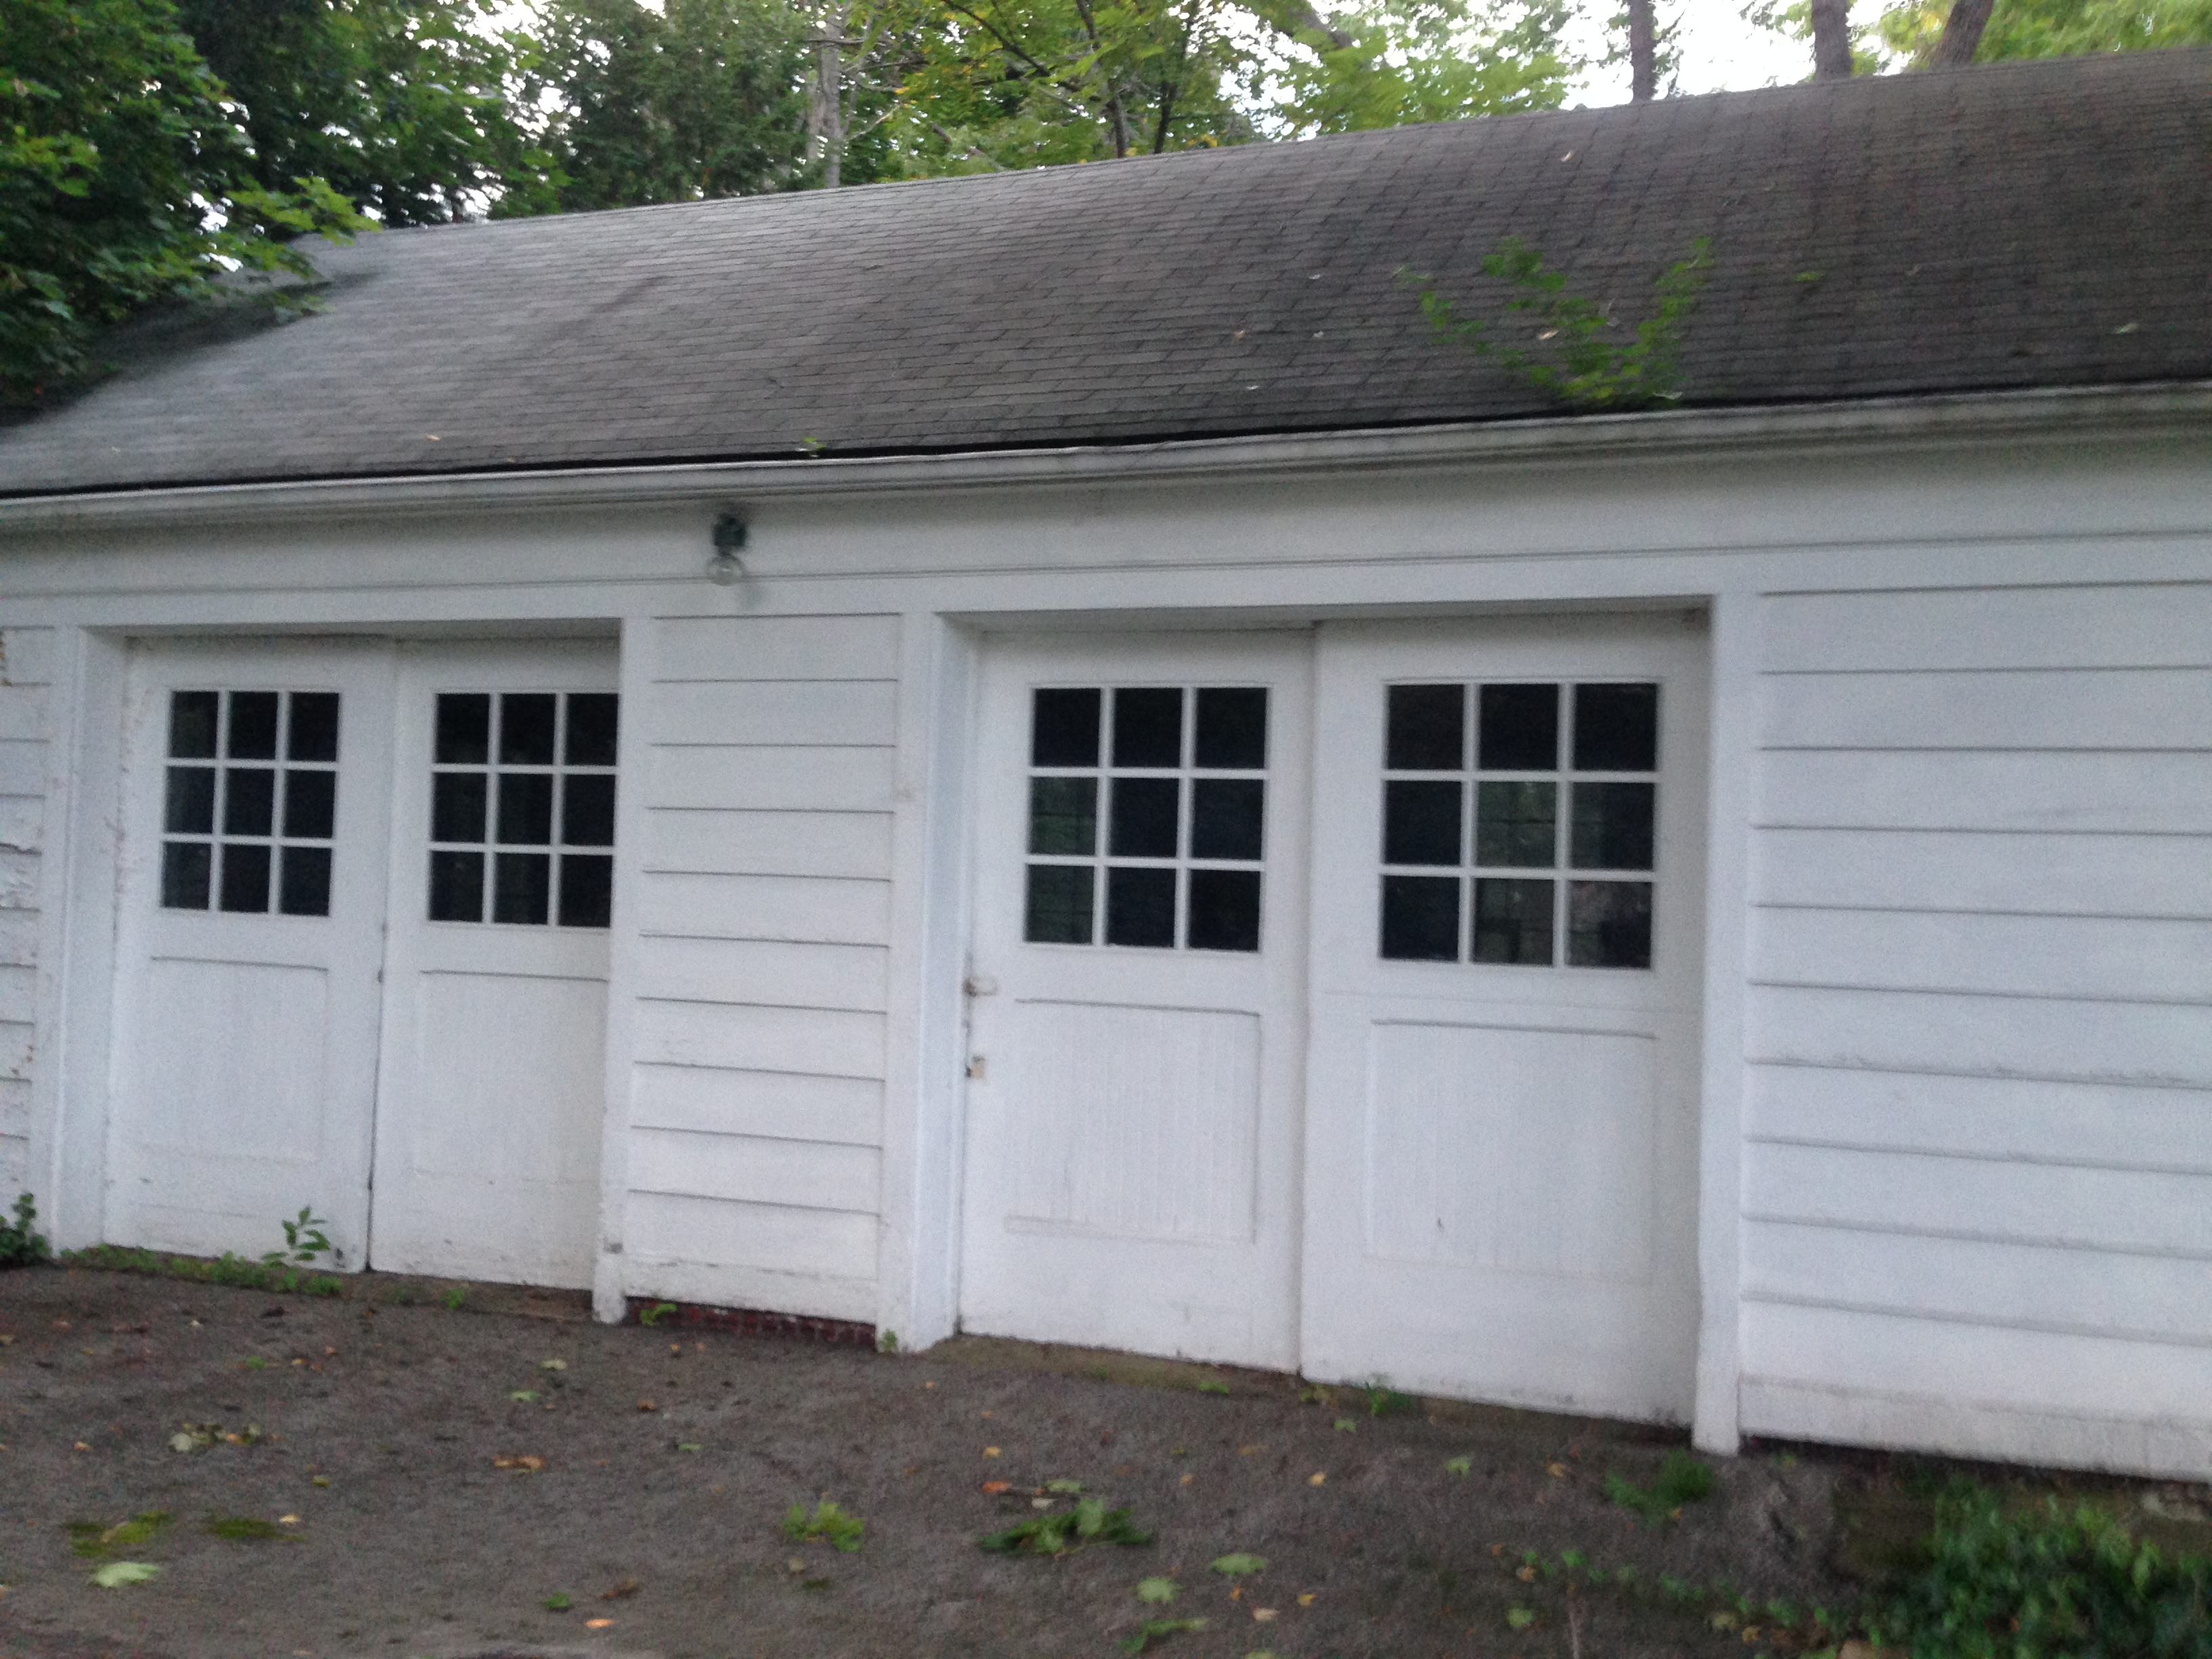
The house was purchased from an estate, with the previous owner occupying the property since 1973. Challenges includes a structurally deficient garage, water intrusion in the basement, as well as carpet and wallpaper throughout that were stained by years of cigarette smoking. In addition, kitchen and bathroom were in need of updating.

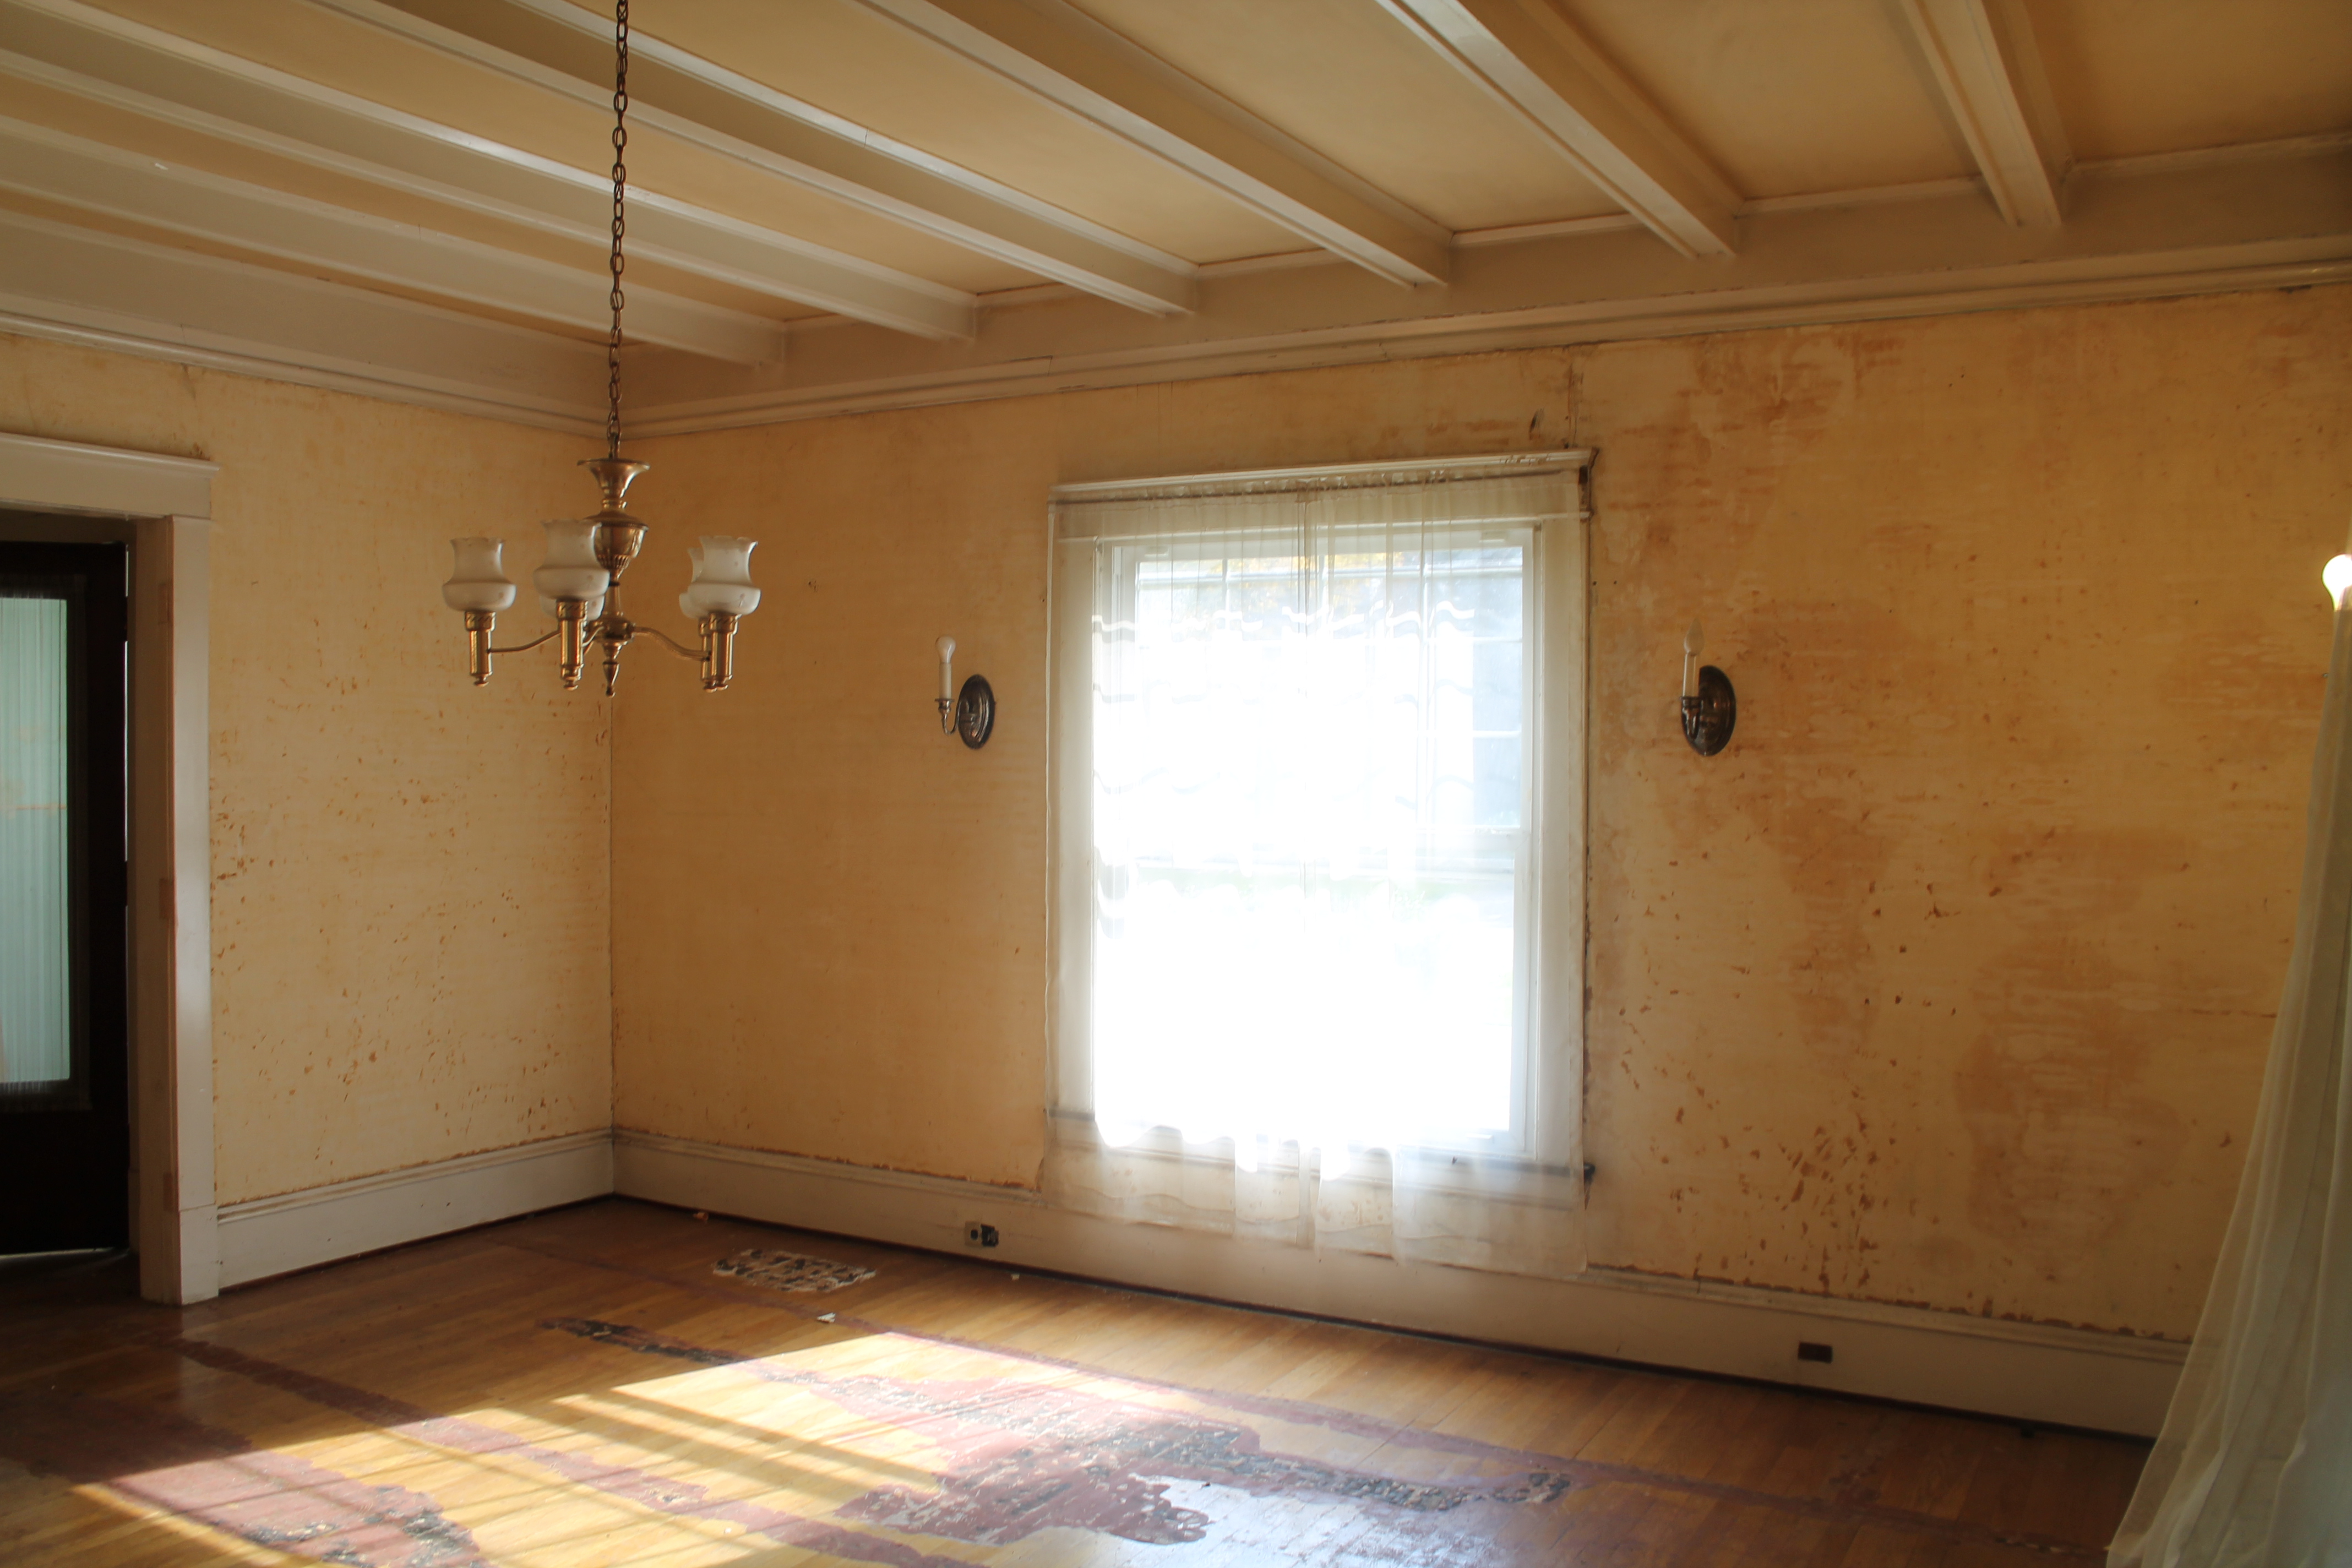
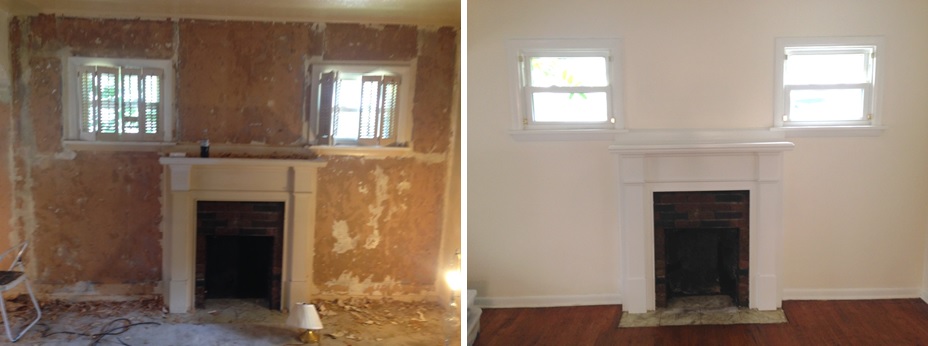
The most time consuming aspect of the renovation was the removal of the yellow-tinted wallpaper in every room in the house. Even on the ceilings! After the wallpaper was removed, the drywall was full of gashes and pot-marks that needed to be filled and sanded. This alone took more than a week to do. What’s more, all of the beautiful trim in the house was stained yellow from 30+ years of cigarette smoking. Nothing an industrial paint sprayer can’t handle, though!

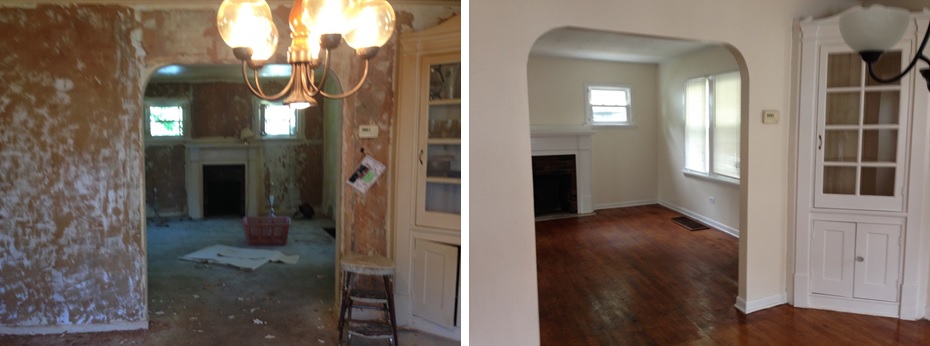
Dining Room & Living Room: After the wallpaper was removed, the walls were coated in Kilz Primer (to seal the smell of smoke) and then painted using “Pip” by Martha Stewart. Trim was painted, chandelier replaced and hardwood refinished. We also updated the hardware on the beautiful built-in cabinets.


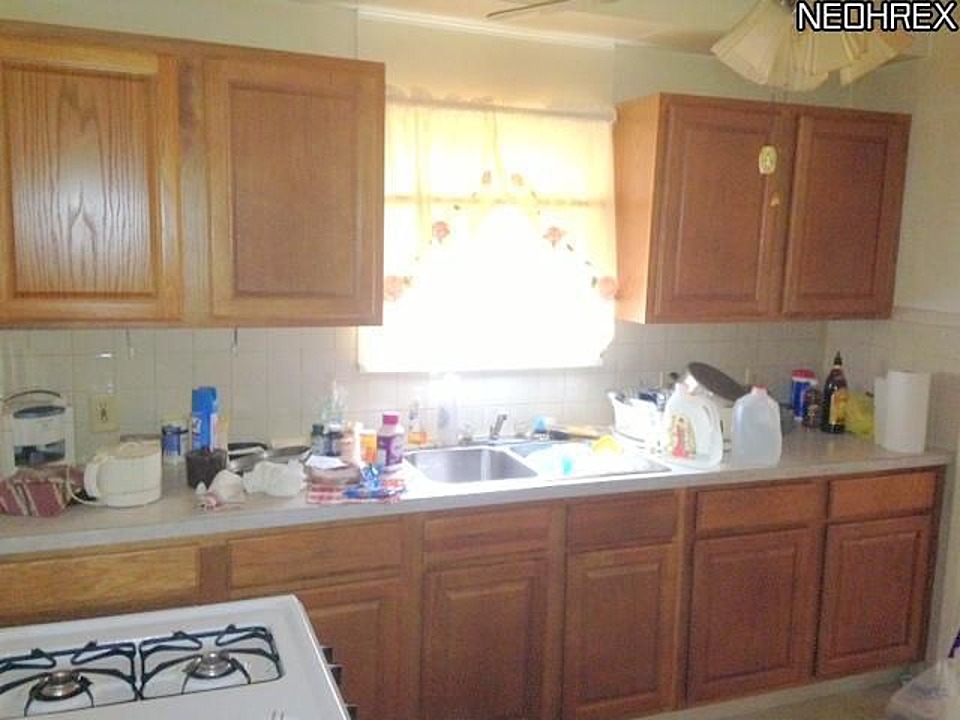
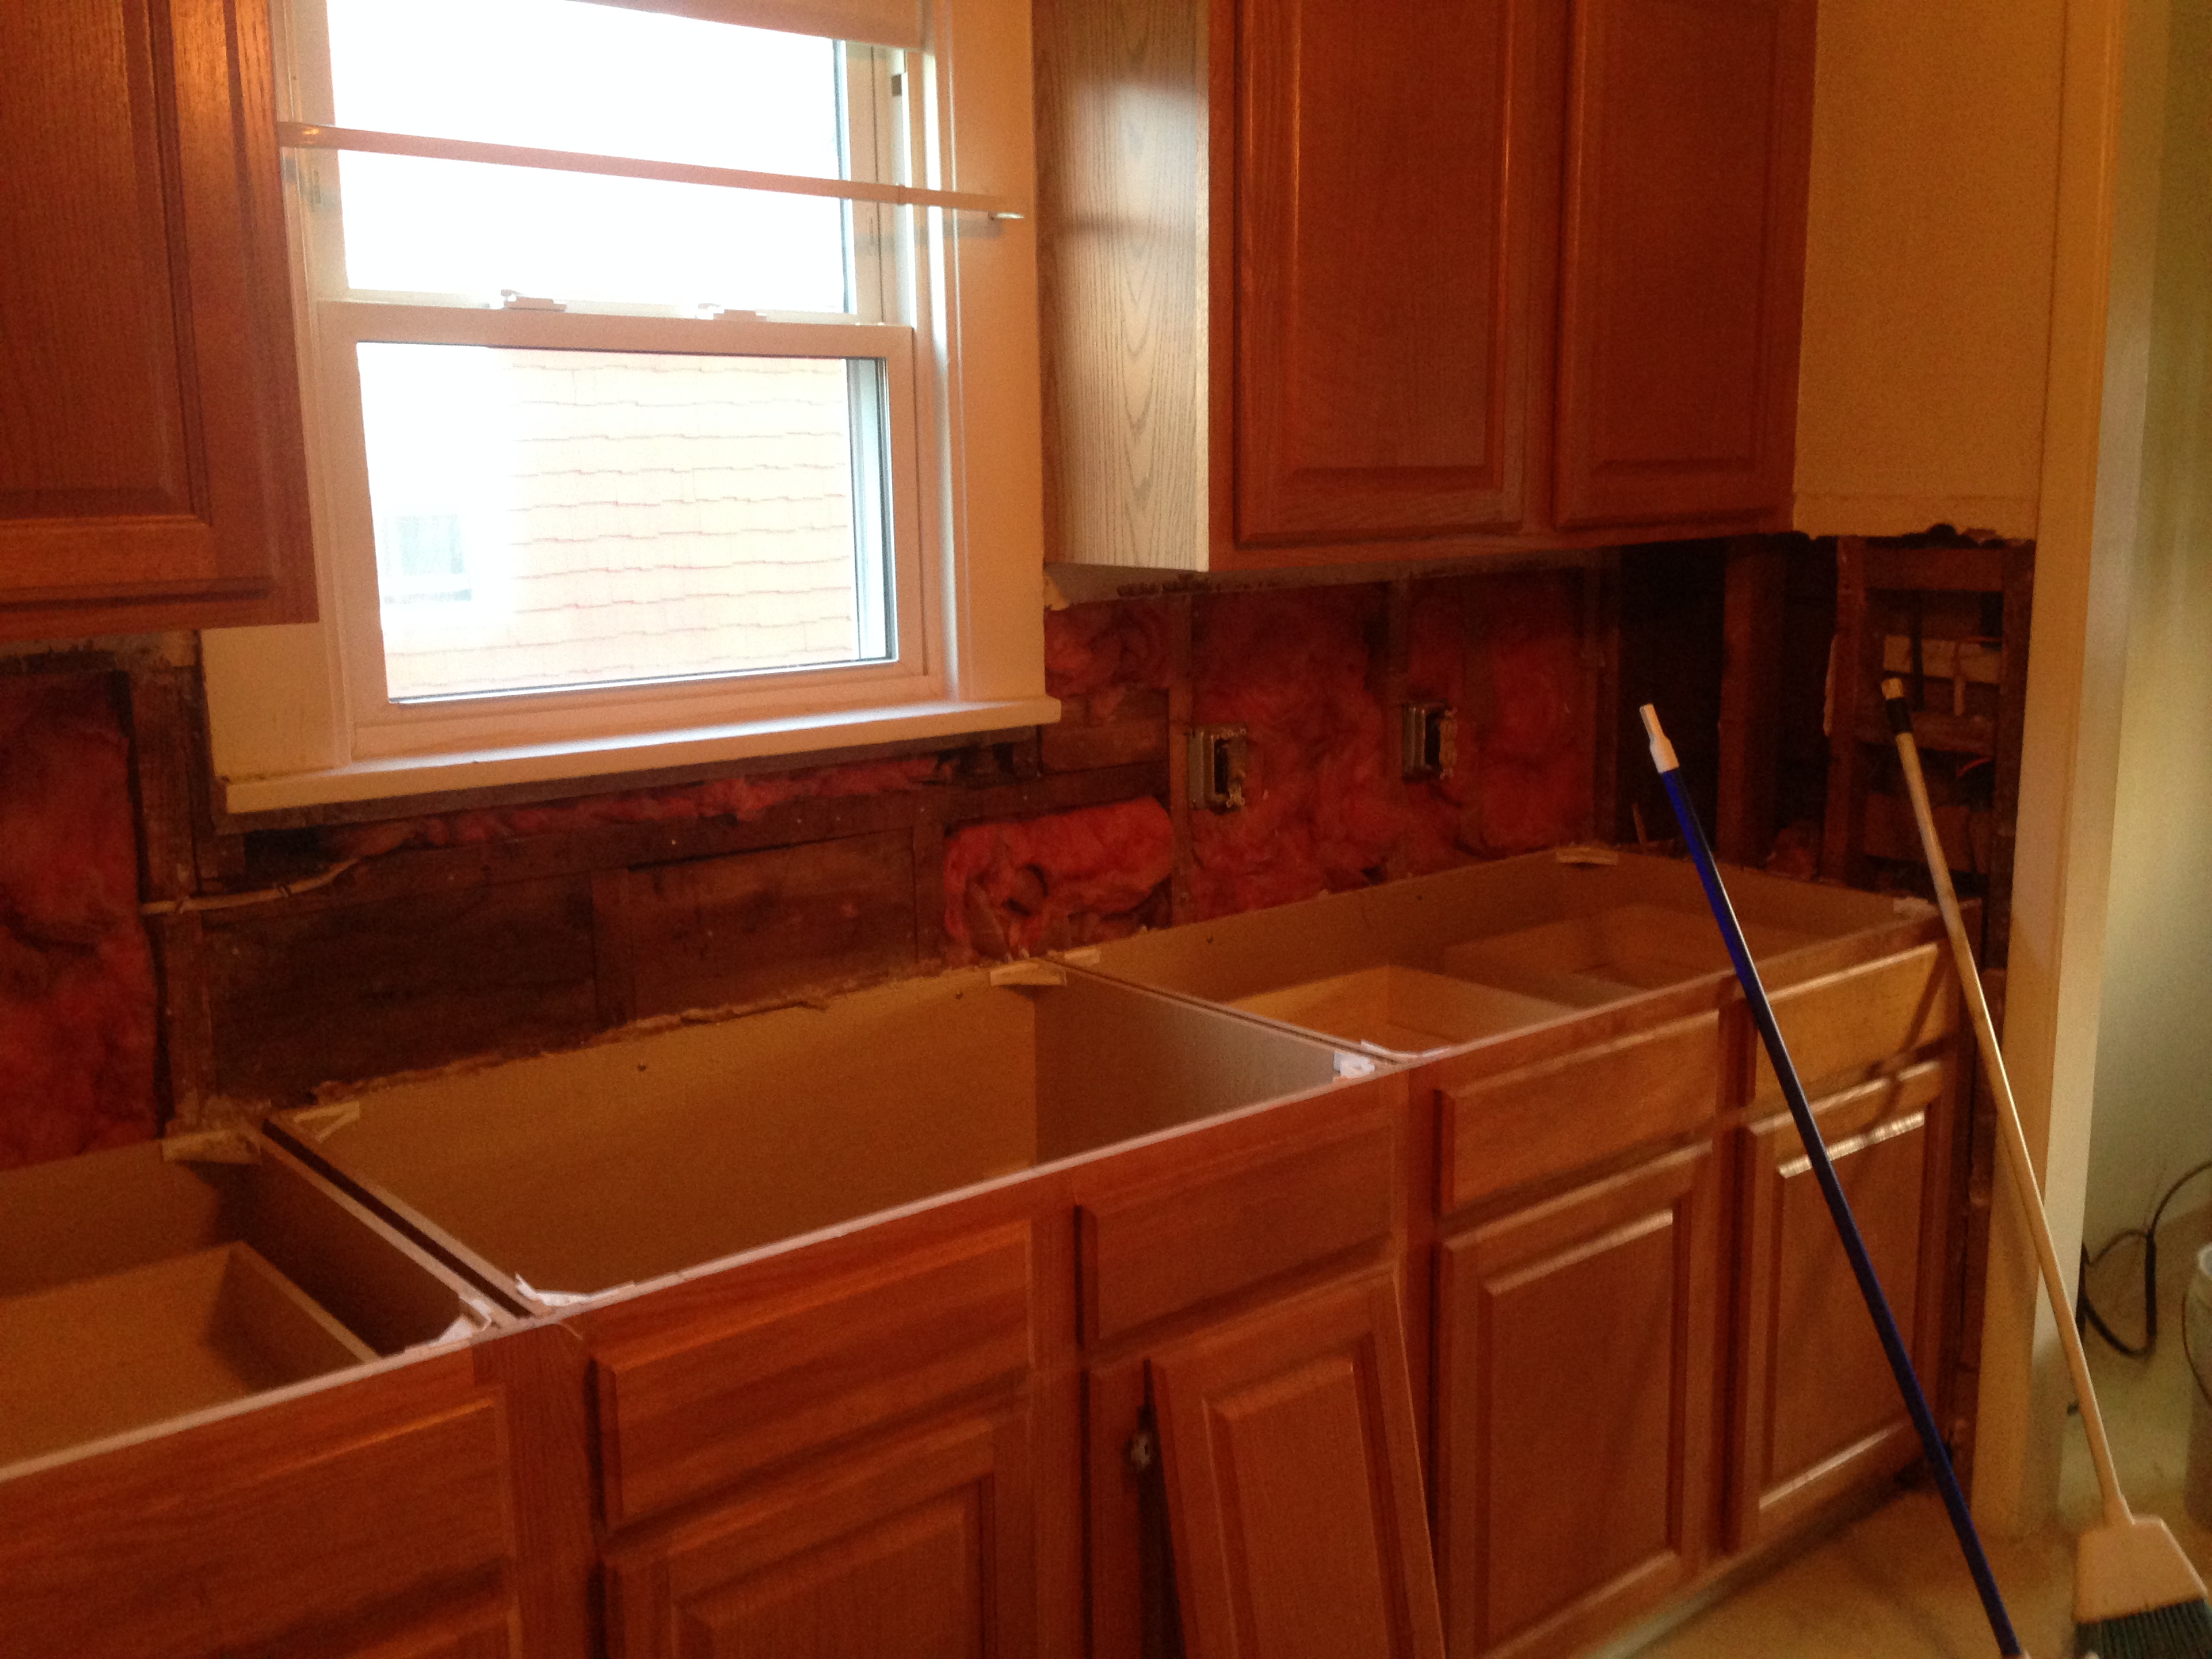
Kitchen: The cabinets were recently updated and in fantastic shape, so we decided to keep them. I’m not thrilled with the finish, but the new granite, backsplash and hardware does certainly ease the pain. We also installed luxury vinyl tile throughout the kitchen, which is a breeze to install (peel & stick!) and can truly pass off as more expensive tile as the seams are grouted.


Kitchen 2
kitchen

Bathroom: We replaced the vanity and toilet, painted the walls after removing the wallpaper and installed the same LVT as we had in the kitchen.

Bathroom

Basement: This was quite the headache. There was a tremendous amount of water intrusion in the basement, so we opted for an interior waterproofing system (B-Dry). Once that was completed, we framed out half of the basement to create a finished play area.


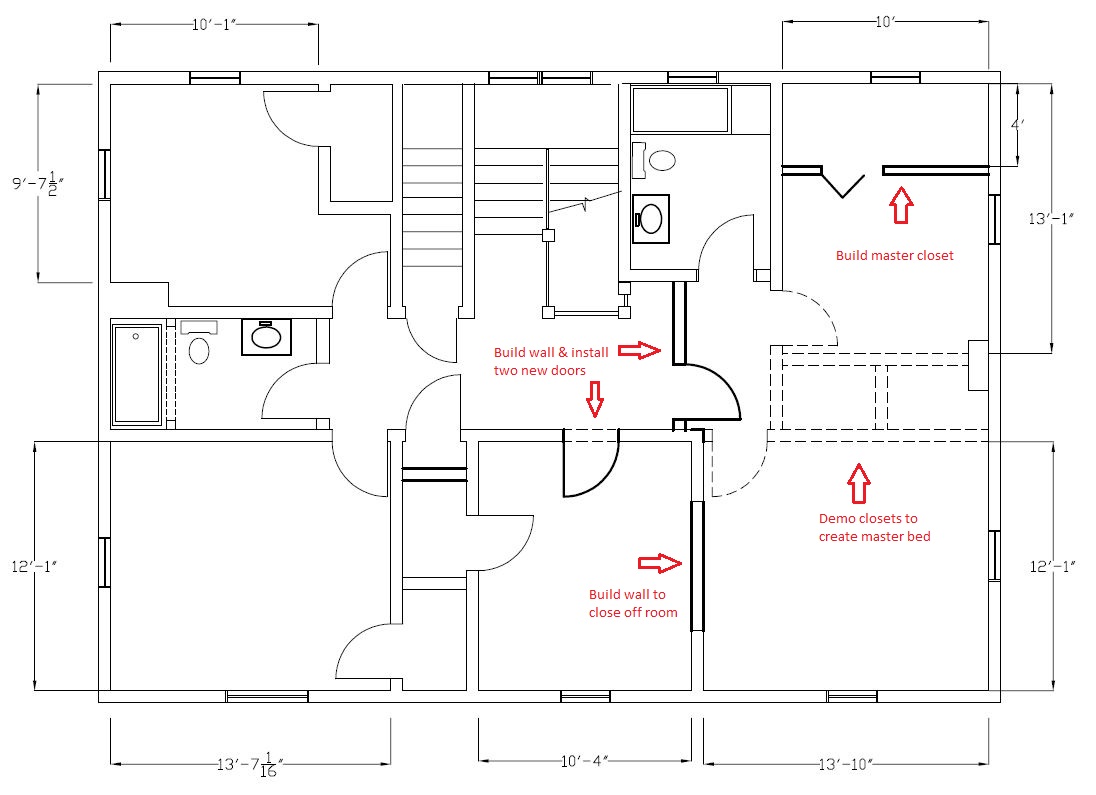
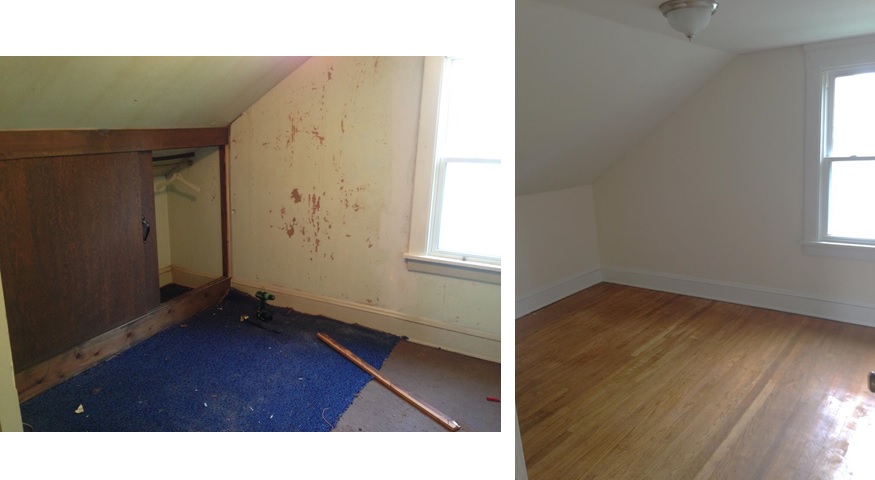
Bedrooms: Most of the bedrooms were straight forward; remove wallpaper and paint.  One of the smaller bedrooms has an unsightly closet that made the room feel even more cramped than it already was.  Looks much better without it!


Bed


So, with that, on to the next one! We have a few in the works right now, including a 3,300 sq. ft. home built in 1914 (!!!) and a gorgeous duplex in a historic part of town.


We’re Back!

So, I’ve been MIA for awhile! I’m sorry!

We’ll have more regular updates over the next several weeks as we transition from our latest rental property rehab to some DIY projects around our house in anticipation of our baby girl’s birth in late October. My wife is ready to kill me as I haven’t even started the nursery 😮

Until then, I have a lot to share – we recently completed the rehab of our first rental property, bought a second one and are on the lookout for a third. It’s been an interesting journey thus far, with far too many “Oh shit, I didn’t budget for that” moments and late nights to boot.

Kitchen Update – Granite Selection


Selecting finishes is everyone’s favorite part of a rehab – it’s when things finally start coming together and your vision becomes a reality.  While much of the house is still in full throws of rehab, the kitchen demo is complete and is finally ready for a little love.  We’re still bouncing around ideas for flooring and backsplash, but my wife took a quick trip to the local granite supplier to pick out the countertops.

Granite was the first finish we selected as it will dictate our backsplash and flooring selection.  In that the existing cabinets have a  natural oak finish, my wife select a rustic granite with hints of cream, beige and brown.   Doesn’t it blend perfectly with the cabinetry?  You’d think she’s done this before!

Given the granite selection, my wife suggested we go with a darker floor covering and simple and light backsplash. I agree!  We don’t have anything in mind just yet, but will be heading to TileShop to make our selection.  They have such a diverse product offering (much better than Home Depot or Lowe’s) and their prices are similar, if not better.

Kitchen Update – Demo Complete!

Construction is well on its way in all corners of the rental property – from stripping wallpaper in each of the eight rooms and hallways, demoing the waterlogged walls in the basement, interior waterproofing and most notably, rehabbing the kitchen!

Our plans for the kitchen are as follows:

  1. Update flooring in the kitchen and hallway with either tile or luxury vinyl tile
  2. Put in new granite countertops and backsplash
  3. Install new cabinet hardware (nobs and pulls)
  4. Replace light figures (there’s a ceiling fan in the kitchen!)

To keep within budget, my wife and I decided to keep the existing cabinets.  While we originally wanted to replace them, the cabinets are in tremendous shape and are only a few years old. We’re optimistic that new flooring, cabinet hardware,backsplash and colorful granite will be sufficient to give this kitchen the updated look it deserves.

We just wrapped up demoing the existing square white (beige?) tile backsplash and removing the old countertops.  Next step is to install drywall and select our finished – the fun part!  We’ll be sure to keep you in the loop!

Before

Before

Demo Complete

Demo Complete